

Table of Contents
- Why Loose Engagement Ring Settings Happen
- Signs Your Engagement Ring Setting Is Loose
- How to Check If a Diamond Is Loose at Home
- Signs of Worn Down Prongs to Watch For
- What to Do the Moment You Notice a Loose Stone
- Your Engagement Ring Maintenance Schedule
- Cleaning and Caring for a Loose or Vintage Setting
- Conclusion
- Frequently Asked Questions
Last Updated: September 30, 2026
Why Loose Engagement Ring Settings Happen
A loose setting is common in older rings and rarely happens overnight. Daily contact with desks, door handles, and lotions thins prongs and weakens solder joints until a stone that once sat tight starts to shift.
Here's what causes it:
- Daily wear thins the prongs that hold the stone
- Knocks against hard surfaces bend metal out of shape
- Temperature changes stress older solder joints
- Cleaning with harsh chemicals weakens vintage settings
Signs Your Engagement Ring Setting Is Loose
The clearest sign is movement: if the center stone shifts, spins, or clicks when you touch it, stop wearing the ring. Other signs are quieter:
- A visible gap between the stone and its prongs
- A rattling sound when you shake the ring gently near your ear
- Tilted prongs that no longer sit evenly around the stone
- Snags on clothing or hair catching where they never did before
- A stone that spins inside a bezel setting it used to sit tight in
Check side stones too: accent diamonds loosen just as often and are easier to lose because they are smaller.
What You Will See and Feel
Run your fingertip around the stone's edge: smooth metal and even prongs are normal, while a rough edge, sharp tip, or gap you can catch a fingernail in means the setting needs attention. Hold the ring to a light, a well-set stone sits flush with no daylight showing through. Dark or chalky patches on the prongs mean the metal is wearing thin, a sign of worn down prongs and a setting closer to failing than it looks.
How to Check If a Diamond Is Loose at Home
You can check a diamond at home in under a minute with two simple tests. Neither replaces a professional inspection, but both tell you whether to keep wearing the ring. Work over a soft surface like a folded towel so a freed stone lands somewhere findable.
The Tap and Wiggle Test
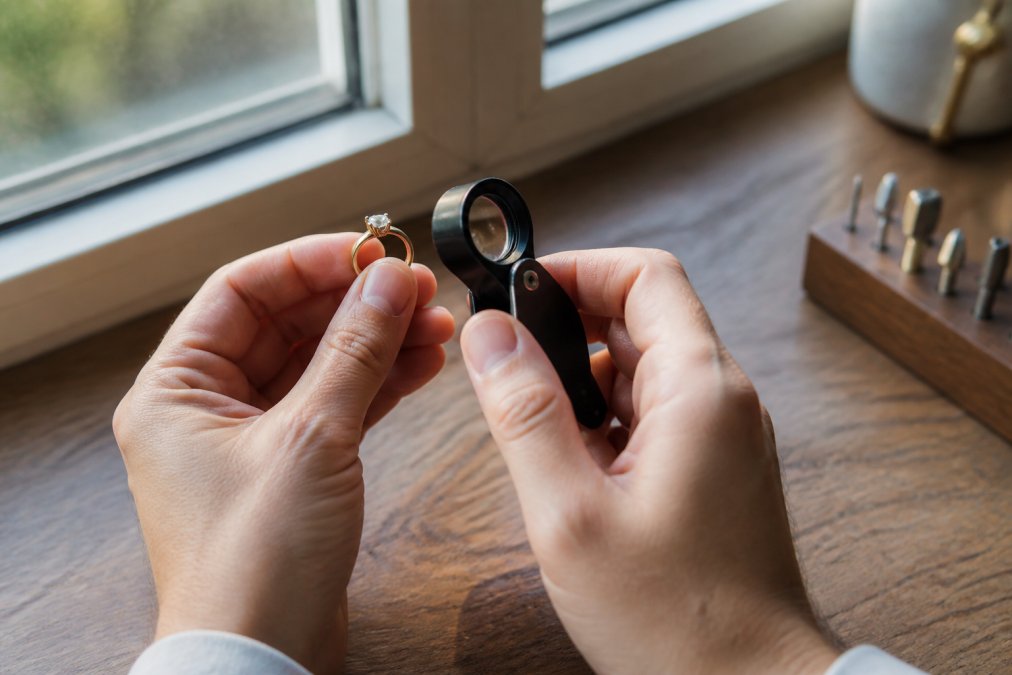
How to check if a diamond is loose: hold the ring between thumb and forefinger and gently tap the stone with a fingernail. A tight stone makes a dull thud; a loose one makes a sharper click or faint buzz. Then press the stone lightly side to side, it should not move at all. Even a tiny shift means the prongs are not holding it correctly.
A few ground rules:
- Never use tools, tweezers, or pliers for this
- Never press hard enough to bend a prong
- Never test over a sink or hard floor
- Stop the moment you feel any movement
Signs of Worn Down Prongs to Watch For
Thin prongs are the leading cause of lost stones, and they fail predictably. A prong is a small cantilever of metal bent over the stone's girdle; every knock flexes it slightly, and because precious metals are soft, each flex moves the metal a microscopic amount. Over years the tip thins, the bend opens, and the prong stops bearing on the stone, the stone falls out because the prong quietly stopped touching it, not because it broke.
- Prong tips that look flattened, rounded, or uneven compared to their neighbors
- Metal thinned to a sharp point or a knife edge
- A prong sitting visibly lower than the others
- Small cracks, pits, or a chalky gray texture on the metal surface
- Prongs that no longer make contact with the stone's girdle
- A gap you can catch a fingernail under, even if the stone does not move yet
The DIY Versus Professional Red Line
Still in the watch-and-document zone:
- Prongs look even and make full contact, but the ring is over ten years old
- You see minor surface scuffing with no gap and no movement
- The stone is tight but the ring has never been professionally inspected
Crossed into the professional-only zone:
- Any movement at all, in any direction, however slight
- A visible gap between the girdle and the prong tip
- A prong you can flex with light fingernail pressure
- Cracks, pits, or a chalky texture in the metal
- A prong that has snapped or bent away from the stone
- Any ring with a thin girdle, a chip, or a fracture near the edge of the stone
If you are unsure which zone your ring is in, treat it as professional-only. No home test can see what a loupe sees.
What to Do the Moment You Notice a Loose Stone
Stop wearing the ring right away, the single most important step.
Then follow this order:
- Remove the ring and place it in a soft pouch or a box with a lid
- Do not clean it with brushes, steam, or ultrasonic machines
- Do not try to tighten the prongs with household tools
- Call a jeweler and describe what you felt or saw
- Bring the ring in as soon as you can get an appointment
Your Engagement Ring Maintenance Schedule
A maintenance schedule keeps small problems from becoming expensive ones, but most published schedules stop at "get it checked twice a year." Two things they leave out matter just as much: post-repair care, and documenting the ring so a loss is recoverable.
Start with the baseline cadence.
| Frequency | Task | Why It Matters |
|---|---|---|
| Daily | Remove before gym, dishes, cleaning, and swimming | Prevents knocks, chlorine exposure, and chemical wear |
| Weekly | Wipe with a soft, lint-free cloth | Removes lotion, oils, and grit that act as abrasives |
| Monthly | Inspect prongs in good light over a soft surface | Spots thinning metal and new gaps early |
| Every 6 months | Professional prong check under magnification | Catches loose stones, thin girdles, and worn seats before loss |
| Yearly | Full cleaning and inspection | Maintains stone security and lets a jeweler track wear over time |
Post-Repair Care: The First 30 Days
After a prong tightening, reset, or rebuild, the setting is at its most stable but also its most unproven. Most jewelers recommend a short adjustment period.
- Keep the first two weeks light. Avoid gym sessions, heavy lifting, gardening, and anything that puts lateral pressure on the ring.
- Re-check the stone weekly. A stone that was tight at pickup and shifts within a month usually means the seat needs more work, not that the repair failed.
- Return for a follow-up. Many jewelers include a complimentary post-repair check within 30 to 60 days. Take it. A bench can confirm the prongs are still bearing correctly after the metal has settled.
- Do not clean aggressively. Skip ultrasonic and steam for the first month, and use only a mild cleaner once the jeweler clears it.
- Store it separately. A soft pouch or a lined compartment prevents the ring from knocking against harder pieces in a box.
Document the Ring Before and After Any Repair
Before the ring leaves your hands for any repair:
- Photograph it from every angle in good light, including close-ups of the stone, the prongs, and any existing chips, scratches, or wear marks. Date the photos.
- Note the stone's specifications if you have them, carat weight, cut, color, clarity, and any lab report number. If you do not have a report, ask the jeweler to verify and document the stone's identity before work begins.
- Get the repair described in writing. Ask for the scope in plain terms: which prongs are being tightened, whether the seat is being rebuilt, and whether any stone is being removed and reset.
- Confirm the stone is the same stone on return. A reputable jeweler will show you the stone under magnification at pickup and match it to the intake notes. This is standard practice, not an accusation.
After the repair:
- Update your appraisal. An appraisal older than two or three years may not reflect current replacement values, and insurers often require a recent one.
- File the paperwork with your policy. Keep the appraisal, the repair invoice, and the dated photos together, either physically or in cloud storage.
- Check your coverage. Many homeowners and renters policies cap jewelry coverage or require a scheduled rider for high-value pieces (Do I need special coverage for jewelry and other valuables?). Confirm the ring is listed by description, not just by a blanket limit.
- Re-photograph after the repair. The post-repair condition is your new baseline for the next inspection.
For high-value or inherited pieces, keep a current appraisal on file and review it every few years. An up-to-date appraisal helps with insurance and gives your jeweler a record of the piece's construction and materials, which matters most when a future repair must match original work.
Cleaning and Caring for a Loose or Vintage Setting
Do not clean a ring with a loose stone. Water and cleaning solution can work into the gap and loosen it further, and a brush can knock a shifting stone free.
Vintage and antique jewelry needs extra caution:
- Skip ultrasonic cleaners on older pieces, since vibration can loosen worn settings
- Avoid thermal shock, which means no hot water on cold stones or the reverse
- Watch porous stones like opals and turquoise, which absorb liquids and can discolor
- Protect the patina on antique pieces, since polishing can erase detail that took decades to form
Conclusion
A loose setting is not a reason to panic, but it is a reason to act today. The signs are easy to miss until a stone is gone, and by then the repair costs far more than a tightening would have.
Frequently Asked Questions
How can I tell if my diamond is loose in its setting?
Hold the ring near your ear and tap the band gently with a fingernail. A sharp ping means the stone is secure; a dull rattle suggests movement. You can also press the stone lightly with a toothpick and watch for any shift inside the setting. If you see the stone move at all, stop wearing the ring and have a jeweler inspect it.
How often should I have my engagement ring prongs checked?
Most jewelers recommend a prong inspection every six months, especially if you wear the ring daily. Add a check after any knocks, gym sessions, or travel. A quick inspection takes minutes and catches worn prongs before a stone works free. Pair it with a gentle cleaning so you can see the setting clearly.
Is it safe to wear a ring if the stone feels loose?
No. A loose stone can fall out during ordinary tasks like washing dishes or putting on a coat. Remove the ring and store it in a soft pouch until a jeweler tightens the setting. Wearing it risks losing the stone entirely, which turns a simple prong tightening into a full stone replacement.
Can a loose engagement ring setting be repaired?
Yes. Most loose settings are fixed by tightening or rebuilding prongs, and a jeweler can often reinforce the setting with laser welding. The repair cost depends on the metal and how much wear exists. Have it checked early, since a quick tightening is far simpler than replacing a lost diamond.