

Table of Contents
- What You'll Need to Inspect Custom Jewelry Craftsmanship
- Step 1: Check Purity Stamps and Maker's Marks
- Step 2: Inspect Prong Settings and Stone Security
- Step 3: Spot the Signs of High Quality Jewelry Finishing
- Step 4: Identify Natural vs. Lab-Grown Stones and Request Certified Lab Reports
- Step 5: Trace the Custom Jewelry Design Process Steps
- Questions to Ask a Custom Jeweler Before You Buy
- Conclusion: Your Inspection Checklist
- Frequently Asked Questions
Last Updated: October 2, 2026
What You'll Need to Inspect Custom Jewelry Craftsmanship
Knowing how to verify custom jewelry craftsmanship comes down to a few basic tools and one good light source. At Eklektic, we hand-build every piece in our studio, so we can tell you exactly where to look for the details that separate real handwork from factory output.

Here is what to gather before you start:
- A 10x jeweler's loupe
- A bright, adjustable lamp
- A soft cloth and a clean tray
- Any paperwork from the maker
Step 1: Check Purity Stamps and Maker's Marks
A purity stamp tells you what metal you actually have. On karat gold, look for a mark like "14K" or "585." On sterling silver, look for "925" or "sterling." These stamps are usually inside the band or on the clasp.
Reading Hallmarks on Karat Gold and Sterling Silver
The karat number is the metal's purity. "14K" means 14 parts gold out of 24 (Buying Platinum, Gold, and Silver Jewelry). "925" means 92.5 percent silver (Buying Platinum, Gold, and Silver Jewelry). A missing stamp on a fine piece is a red flag worth questioning.
Why Artisan Maker's Marks Matter
A maker's mark is the artisan's or studio's signature stamp. It lets you trace who made the piece. A real studio stamps its work. A piece with no maker's mark is hard to trace back to anyone.

Step 2: Inspect Prong Settings and Stone Security
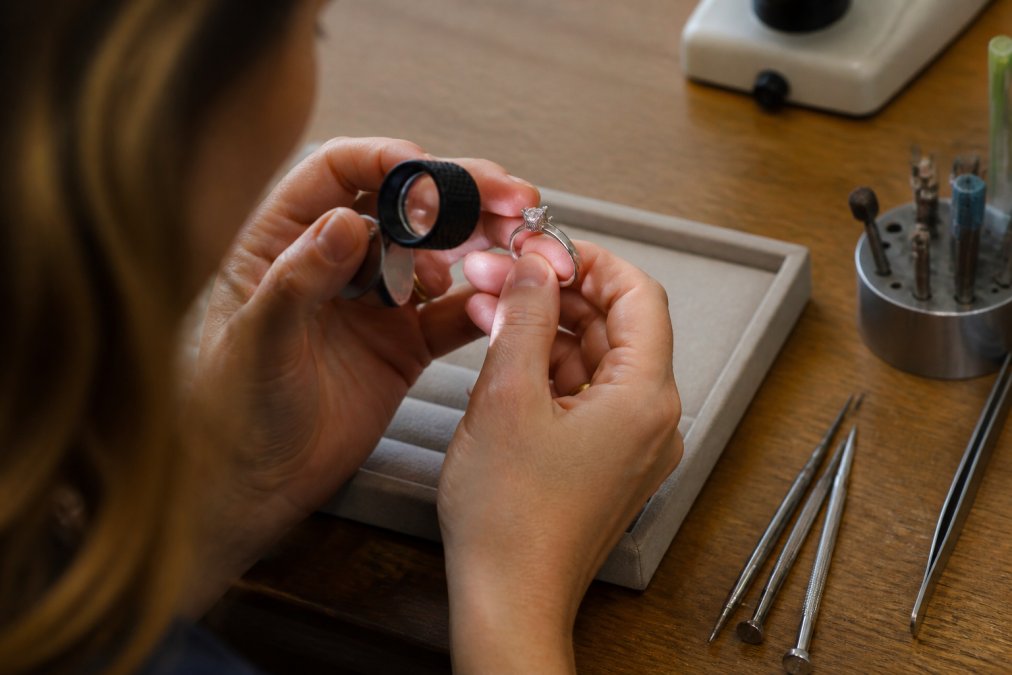
Secure prong settings hold stones tight and even. Run a loupe over each prong. They should sit flat against the stone and match in thickness. A loose or uneven prong can drop a stone.
Checking Stone Alignment and Symmetry
Stone alignment should look even across the piece. Check that each stone sits level and the spacing stays consistent. Symmetry matters most on a matched set. If one side looks off, the setting was rushed.
Step 3: Spot the Signs of High Quality Jewelry Finishing
Finishing is where handwork and factory output separate most clearly, and it is the one area where a buyer with a 10x loupe can make a confident call in under a minute. The trick is knowing which zones to inspect and what a defect looks like at magnification.
Mold Seams vs. Hand-Forged Surfaces
A mold seam is a thin ridge of metal left where two halves of a casting mold met. On a factory piece it often runs along the side of a band, the underside of a pendant bail, or the inside curve of a shank. Under a loupe it reads as a faint raised line, sometimes with a slightly porous or pitted texture beside it.
What to flag:
- A visible seam that was never ground away
- Pitting or porosity (tiny pinprick holes) on a cast surface
- A seam that has been partially filed, leaving a flat spot next to a raised ridge
- Sharp, unfinished edges where a casting sprue was cut
Polish Quality in Recessed Areas
Recessed areas are the small gaps, undersides, and inside curves that a polishing wheel struggles to reach. This is where rushed work hides, because polishing these zones takes time a production line will not spend.
Run your loupe along:
-
The inside of a band or shank
-
The space between prongs and the stone
-
The underside of a gallery or basket setting
-
The back of a pendant or the inside of a clasp
-
The gap between a bezel and the stone it holds
-
A dull, matte, or oxidized patch where the rest of the piece is bright
-
Fine parallel scratches left by a coarse abrasive that was never refined
-
A sharp burr or lip at the edge of a recess
-
Polishing compound residue packed into a crevice
-
A color shift, the recess looks grayer or yellower than the surrounding metal
Reading the Joints and Solder Lines
Where two pieces of metal meet, the quality of the joint tells you how the piece was assembled. A well-executed solder joint is nearly invisible: the metal flows together, the seam is clean, and the polish carries across it. A poor joint shows a dark line, a lump of solder, or a color mismatch where the solder alloy differs from the parent metal.
Check the joints at:
- The shoulders where a shank meets a head
- The bail of a pendant
- The hinge and catch of a clasp
- Any place a decorative element was added to a base
A Quick Pass/Fail Read
If the recesses are smooth, the joints are clean, and there is no visible seam or porosity, the finishing was done by hand or by a shop that cares. If you find two or more of the defects above on a single piece, ask the maker to walk you through the finishing process before you commit.
Step 4: Identify Natural vs. Lab-Grown Stones and Request Certified Lab Reports
A certified lab report is the fastest way to confirm what a stone is. Ask for one from a grading lab. The report lists the stone's type, weight, and quality.
Step 5: Trace the Custom Jewelry Design Process Steps
Most guides stop at the finished piece. The stronger move is to verify the design process itself, because the digital and paper trail a studio keeps is the earliest evidence of whether the craftsmanship you are paying for is real. This is the step almost no competing guide covers in detail, and it is where a buyer can catch problems before metal is ever cast.

What the Design Process Should Look Like
A documented custom build moves through a predictable sequence. Ask the studio to walk you through each stage and to show you the artifacts from it:
- Concept and sketch, hand or digital drawings capturing your idea
- CAD model, a 3D digital file built to your specifications
- Render, a photorealistic image generated from the CAD model
- Wax or resin print, a physical model for fit and proportion checks
- Casting or fabrication, the piece is produced in metal
- Setting and finishing, stones set, surfaces polished, final QC
Verifying CAD Files and Digital Records
Ask to see the CAD file for your piece. You do not need to read the software; you need to confirm a few things:
- The file is specific to your design, not a stock model with your stone dropped in
- The dimensions match what you approved (band width, stone size, overall length)
- The file shows the setting style you agreed on, not a generic prong head
- The file was created or modified on a date consistent with your project timeline
Comparing the Render to the Finished Piece
When you pick up the finished piece, put the render and the real thing side by side. Check:
- Overall proportions, does the band width match the render?
- Stone placement, are the stones where the render showed them?
- Metal color and finish, does the polish match the render's finish?
- Any design element that was added or dropped between render and delivery
Ethical Sourcing Documentation
Ask where the metals and stones came from, and ask to see the paperwork. Reputable studios can typically provide:
- Invoices or receipts from their metal supplier
- Certification for recycled or responsibly sourced metal, where applicable
- Stone origin documentation, including Kimberley Process certificates for rough diamonds
- Lab reports for any certified stones
Questions to Ask a Custom Jeweler Before You Buy
The right questions to ask a custom jeweler reveal how the studio really works. Here are the ones that matter most:
- Can I see the piece in progress?
- Will you provide a certified lab report?
- What is your policy on repairs and resizing?
- Can you show me your CAD files?
- Where do your stones and metals come from?
Conclusion: Your Inspection Checklist
Use this checklist on any custom piece:
| What to Check | How to Check It | Why It Matters |
|---|---|---|
| Purity stamp | Loupe the inside band | Confirms the metal |
| Maker's mark | Look for a studio stamp | Proves who made it |
| Prong settings | Loupe each prong | Keeps stones secure |
| Stone alignment | Check even spacing | Shows careful setting |
| Finishing | Feel edges and recesses | Reveals rushed work |
| Lab report | Ask for the paperwork | Confirms the stone |
| CAD files | Request digital records | Proves custom design |
| Sourcing docs | Ask where materials came from | Shows ethical sourcing |
If a piece passes these checks, you are holding real craftsmanship. If you want a piece built to this standard, Eklektic designs, casts, sets, and finishes everything on-site in our studio. We work in gold, platinum, and sterling silver, and every custom piece starts with your idea. Book an appointment with Eklektic and create a piece made to be passed down.
Frequently Asked Questions
What are the signs of high-quality jewelry craftsmanship?
Look for crisp purity stamps and a maker's mark, prongs that sit level and grip each stone tightly, and a finish that is smooth even inside recessed areas. Hand-forged pieces show subtle natural variation rather than identical machine-made surfaces. Ask for a certified lab report for any significant stone, and confirm the piece matches the CAD file you approved during the custom jewelry design process.
How can I tell if a custom jewelry piece is well-made?
Start with a jeweler's loupe and check three things: stone alignment, symmetry, and finishing. Every stone should sit at the same height and angle, prong tips should be rounded and uniform, and there should be no mold seams or rough patches on the underside. A well-made piece also comes with documentation, including a purity stamp, maker's mark, and any certified lab reports for the stones.
Does a jewelry appraisal verify craftsmanship quality?
An appraisal confirms what a piece is worth and identifies the metals and stones, but it does not grade how well the piece was made. Two rings with identical materials can differ sharply in prong security, symmetry, and finishing. Use the appraisal for value and insurance, and use your own inspection, plus questions to ask a custom jeweler, to judge craftsmanship itself.
Why is in-studio production important for custom jewelry?
When design, CAD, casting, stone setting, and finishing all happen under one roof, you can ask to see each stage and trace who touched the piece. That transparency makes it easier to verify craftsmanship, request the CAD file, and confirm the maker's mark on the finished item. It also means repairs and adjustments stay with the same team that built the piece.